Winter Knitting Blues

Normally the winter is my most productive time for yarn crafts.  It’s so nice to sit inside under a blanket and knit a warm sweater or a pair of socks that I’ll get to wear (or give!) as soon as they’re finished.

This winter I moved, and it has totally sapped my energy.  I finally got around to finishing a project this past weekend, and it’s suddenly too warm to wear it!  That’s OK – it’ll be back to below freezing next week.

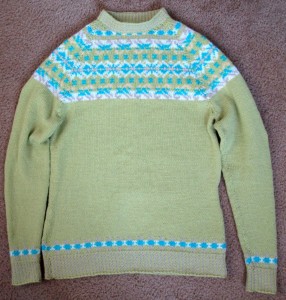
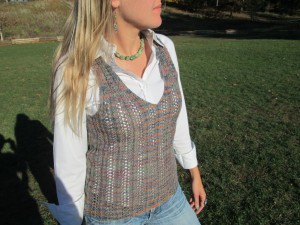
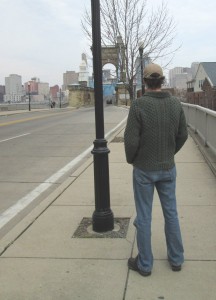
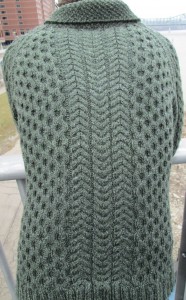
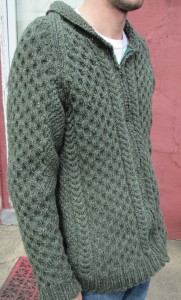
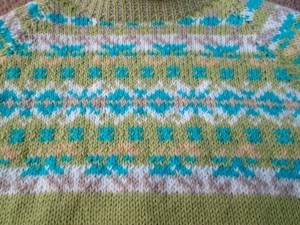
Anyway, in the interest of sparking some creativity (for myself and for the reader), here’s my new sweater.  I’ll be wearing it next week, when the snow returns.

IMG_0853b

IMG_0855bYou can view the color work chart here.

What have you been up to this winter?  Send me an email to share your current projects.

Variegated Yarn, Part 4: Picking the Right Yarn for the Pattern and Vice Versa

The ultimate goal of this series on variegated yarn is to provide helpful information when deciding how to pair variegated yarn with a pattern.

In general, it is best to use variegated yarn with projects that make use of simpler stitches – you can use busy yarn or busy stitch work, but you shouldn’t use both. In addition to this guideline, you should take into account the type of variegated yarn (i.e. short patterning, long patterning, self striping, etc., as discussed in the last post) and the shaping (or lack thereof) in the pattern. A pattern with little or no shaping (such as increases and decreases) will result in regular color patterning just like the swatches in the previous posts. A pattern with lots of shaping will result in a more random assortment of color patterning.

The following examples show cases where I believe I have successfully coupled variegated yarn and a pattern.

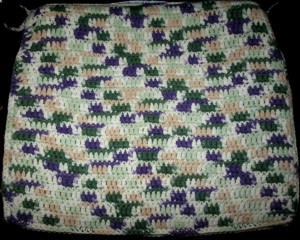
This seat cushion uses short patterning variegated yarn and no shaping. This project is crocheted back and forth in rows, with one row of double crochet followed by a row of single crochet. Because the double crochet rows are wider, their colors stand out, and a diagonal striped pattern is visible (instead of the zigzag pattern normally expected when working back and forth in rows).

IMG_0798

The next example shows a portion of a baby blanket made with short patterning variegated yarn. The blanket itself is square, so there is no shaping. However, each row uses a different amount of closed and open work than the adjacent rows, so the colors form a more random pattern instead of the usual zigzag expected of this yarn.

LucaAfghanCloseup

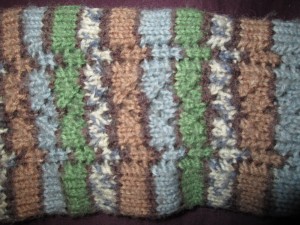
These socks are made with self-striping yarn. A little openwork patterning is done on the sides.

IMG_0800

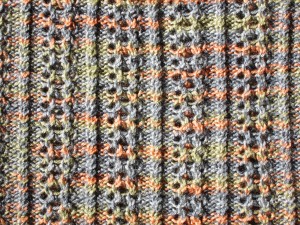
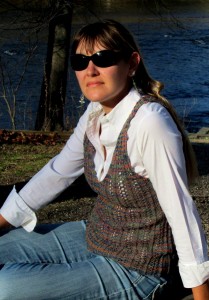
Short patterning yarn is used for this vest, which is knitted back and forth in rows.  A simple lacy pattern and some shaping combine to allow the colors a bit of freedom in their patterning.  (By the way, the knitting pattern for this vest is available in my etsy store.)

IMG_0187

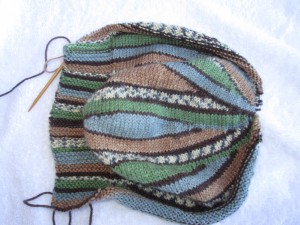
In the last example, self-striping yarn is used in a pattern that requires a lot of shaping.  I’m developing the beret seen below as a way to use self-striping yarn to get more than just stripes.

IMG_0516

These are just some of the ways that I have used variegated yarn.  Over the years I have made many mistakes when forcing a yarn I love to go with a pattern I love even if the two don’t go together.  Spending time thinking about how the colors will play out (using the basic principle presented in the previous posts) and, yes, making swatches are important steps in determining if you have the right yarn for the project – or the right project for the yarn.

What are your success stories in using variegated yarn?  I’d love to see and hear about your variegated yarn projects!

Variegated Yarn, Part 3: Types of Variegation

In the previous two posts, we have been focusing on the specific yarn shown below:

IMG_0520b

This yarn has what we could call ‘short patterning’.  The entire cycle of TBBTWOOW repeats itself rather quickly.  In the sample swatches, the pattern starts over every 1 1/2 – 2 rows.  If we used this yarn for a bigger project, the color pattern would repeat within the same row.

Here are some other yarns with short patterning:

  Caron Simply Soft Yarn-4ozLion<SUP>® </SUP> Cotton

All of these yarns will produce zigzag patterning or diagonal striped patterning, depending on whether you work in rows or in the round.

On the other end of the spectrum, here is an example of ‘long patterning’ variegated yarn:

Yarn Kaleidoscope  Boutique Unforgettable™, large

This yarn will not produce zigzag or diagonal striped patterning.  It will produce stripes, whether it is worked in the round or in rows.  The width of the stripe depends on how wide the work is.  For example, if you used this yarn to make a sweater, the body of the sweater will have narrower stripes than the sleeves.

It is fairly easy to tell the difference between short patterning and long patterning variegated yarn just by looking at it in the skein.  For short patterning yarns, the adjacent strands of yarn will be different colors, and for long patterning yarn, there will be sections of strands of the same color.

Finally, there is also ‘self-striping’ yarn.  This is different from the ‘long patterning’ yarn in that it is generally more intricate and meant to be used for certain projects such as socks.

Self-striping yarn will generally be advertised as such.  It can be tricky to use self-striping yarn for projects other than ones it is intended for.


Variegated Yarn, Part 2: Working in the Round

In the last post, we saw how working back and forth in rows with variegated yarn will lead to a zigzag pattern.  The length of the rows determines how the colors work together in the zigzag pattern.  Another trait of variegated yarn worked in rows is the ‘double up effect’, where you get the same color in two consecutive rows at the edge.  If your rows are long enough, you will also see the double up effect in the middle of your work.

Working in the round produces a different type of pattern.  There is no double up effect and the colors form diagonal stripes that go one way only. They zig, but they don’t zag.

In this example, the orange and tan pair up and the brown and white pair up to form diagonal stripes.  Remember the color schema for this yarn: TBBTWOOW.  You can see that orange is in the same position with respect to tan as brown is to white.

RoundsShort

In the next example, made with longer rows, we get single color diagonal stripes.  If you pick a single column and move up, the rows follow the color schema exactly – white, orange, white, tan, brown, tan.

RoundsLong

To summarize these two variegated yarn posts:

  • Working back and forth in rows produces a zigzag pattern.
  • Working in the round produces a diagonal stripe pattern.
  • The length of the row/round determines how the zigzag or stripe pattern works.  You may need to make a swatch that is the actual length of your project in order to determine if you will like how the variegated yarn works with that project.  If you don’t like what you get, you may be able to significantly alter it by lengthening or shortening the rows by a couple of stitches.
  • In order to visualize how the colors will come together in the zigzag or stripe pattern, it is useful to identify the color schema.
  • Increases or decreases will change the pattern (more on this in a bit).

Next part: different types of variegated yarn…

Variegated Yarn, Part 1: Working in Rows

Man, I’m a sucker for some variegated yarn.

It can look so nice in the skein.

Mary Maxim Lollipop Yarn (908)


Rainbow!


Patons Lace
Gray scale!


Blues!


Bernat Sox Yarn (590)
Dark Rainbow!


All the colors look fantastic together – and I want all those colors in my project.

The possibilities seem endless.  But they’re not. That’s the problem with variegated yarn – what you see on the skein is not what you will see in your knitting and crocheting.  Furthermore, you have very little control over how the colors will play out in your work.

I have abandoned many a project with variegated yarn due to being unhappy with how the colors of the yarn work together in that particular pattern.  The trick to effectively using variegated yarn is to carefully plan how to use it with your project.  This is just like making a swatch – it takes time up front but saves you time in the end.

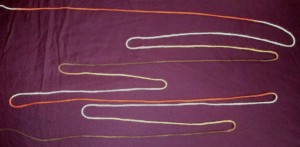
Unless it’s hand dyed, variegated yarn is made with a repeating pattern.  The yarn below has a very simple pattern.  If you follow from the bottom up, you can see that there is a longer section of brown, a shorter section of tan, a shorter section of white, a longer section of orange, a shorter section of white, a shorter section of tan, and repeat.  Basically, there are two main parts – one long section of brown surrounded by short sections of tan and one long section of orange surrounded by short sections of white.  We could abbreviate this as TBBTWOOW.
IMG_0520b

The rigidity and simplicity of this pattern has consequences for how it will work up.

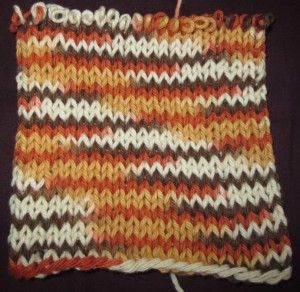
If you knit or crochet back and forth in rows, you will get something like this:
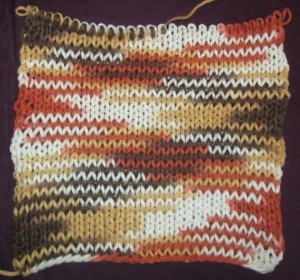
RowsShort

Notice how each color section zigzags back and forth.  The orange and brown, which are opposite each other in the TBBTWOOW color scheme, are also opposite each other in the zigzag pattern.  the tan and white form a less discernible zigzagging pattern in the background.  If you do not do any increases or decreases, this pattern will repeat just like this for the full length of your work.

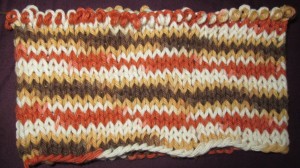
If you don’t like the way the colors mesh, you can try rows with more or fewer stitches.  You will still get the zigzag pattern, but the colors will line up differently:
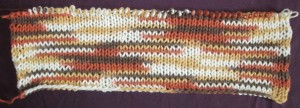
RowsLong

When working in rows with variegated yarn, the edge of the rows looks different from the center.  In the detail below, you see that, at the edge, there are two consecutive rows of the same color, but that this ends as you move further into the center.
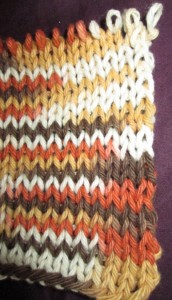
RowEdge

This is due to the fact that when you end one row you are unlikely to end right at the point of a color change, so of course you begin the next row with the same color.  It doesn’t matter how many stitches you have in a row or even if you do increases and decreases – you will always get this effect when working in rows with variegated yarn.

You will also see colors start to double up in the middle of the piece when working in rows that are long enough for more than half the color pattern to be used in one row.  We can divide the longer piece above into roughly seven sections:
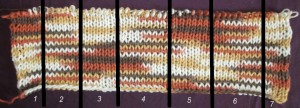
RowsLongWithLines

Sections 1, 3, 5, and 7 have this double color effect.  You can even see that opposite colors (remember the TBBTWOOW schema) occur in the same row in sections 1 and 5 and in sections 3 and 7.  For example, wherever you see brown in section 1, you see orange in the same row in section 5.  Wherever you see white in section 3, you see tan in section 7.

As you become more familiar with these patterns, it will be easier to judge from the beginning if you have the right variegated yarn for the project.

Next part: working in the round…
Fun with Hair Clips

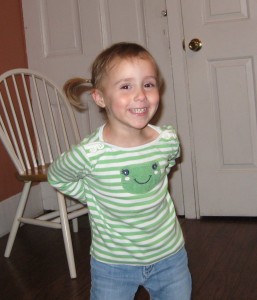
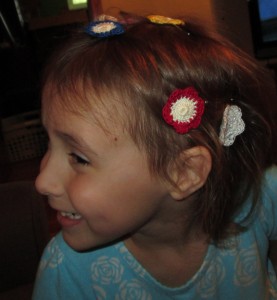
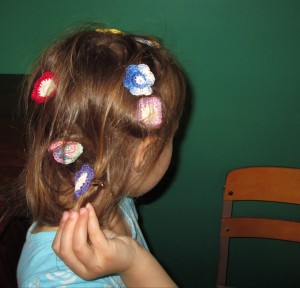
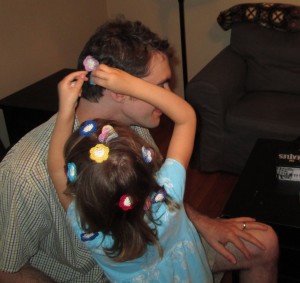
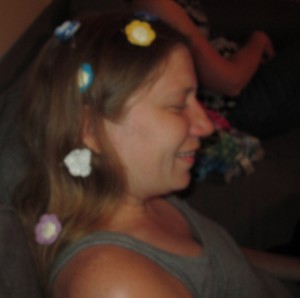
I’ve been working on some cute hair clips for girls to sell on etsy.  The trouble with accessories for kids is that you need pictures of actual kids wearing them. I had to find me some kids.

I called my good friends Pat and Jenny

Photo credit: Ella

Photo credit: Ella

who have an amazing daughter Ella

IMG_0111a

who is pretty much as strong-willed as I am.  I knew I had my work cut out for me if I wanted to get professional looking pictures that showcased my products.

At first Ella was not interested in my hair clips.  Then she was very interested.

IMG_0400a

IMG_0403a

She got everyone to join in the fun.

IMG_0409a

Photo credit: Ella

Photo credit: Ella

In the end, this was the best picture I got.

IMG_0419a

I don’t know if it’s what I need to sell my product, but it’s pretty darn cute! Look at that smile!  I guess I’ll just have to spend more time with Ella, Jenny, and Pat in order to get some more pictures.

Oh, and, parents, Ella spent a good hour playing with these hair clips, so they’re more than just an  accessory – they’re a toy!


Leaf Panel – Free Knitting Pattern

I’ve been working on a big project that I’ve been wanting to do for a long time – one of those wrap cardigans that is just a big rectangle with holes for the arms, so the sides fall down in waves. Here’s an example.

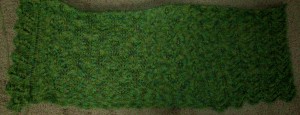
My design is knit from side to side and uses four panels.  Here’s my progress so far:

green wrap progress

I have a long way to go!

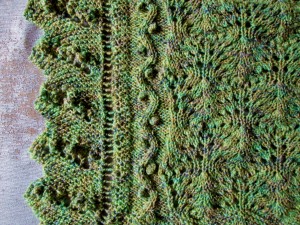
The left side is the top/side edging, and the right side is the bottom.  Here’s a detail of each panel from left to right:

edging

peacock panel

leaf panel

wave panel

All of the panels except the leaf panel are standard designs found in many large pattern books.  I knew I wanted a embossed leaf panel to run along the waistline, but I couldn’t find the right one, so I had to write my own.  The resulting pattern is for an intermediate skill level (experience required), mainly due to the fact that the stitch count is not consistent from row to row.  I’d love to hear what you think of this pattern or if you have any questions!

Forest Green Cabled Jacket

Back with City

I recently made this jacket for my husband.  The pattern called for a simple jacket with ribbed edging and stockinette stitch, but that just didn’t seem like much fun.  I liked the collared, zip-up jacket, so I kept the basic shape of the pattern and added some cable panels and some moss stitch for texture.
On the back, there are three wheat ear cable panels in the middle and honeycomb panels on both sides.  The collar is moss stitch.  The two front panels are honeycomb outlined in wheat ear cables.  The sleeves are all honeycomb, with moss stitch on the underside.
Back Closeup        Front Closeup

Here’s how this jacket looks in a river with some buffalo.  Not bad, eh?
Buffalo!

Hopefully one day I’ll write out the pattern in full!